How to consume our API
Purpose
This documentation aims to provide all the knowledge allowing to consume the uprodit's webservices by external consumers (a mobile application for example).
Insights about the RESTful architecture
The implemented architecture is a distributed architecture known as "RESTful". It means that uprodit is providing "REST webservices" (for "Representational State Transfer").
It is a style of architecture based on webservices using the following principles:
- The format of resources (business data) with the semantics of data description languages such as XML or JSON
- Some HTTP protocol directives that identify the operations which will be performed by the called webservice:
POSTfor creating and persisting a resource in database (or other persistent support)PUTfor updating a resource in database (or other persistent support)PATCHfor partial updating partielle of a resource in database (or other persistent support)GETfor searching and reading a resource in database (or other persistent support)DELETEfor removing a resource from the database (or other persistent support)
- Some HTTP return codes which allow to detect the successful execution of a webservice or to identify the kind of encountered errors:
200: successful reception of a resource (GET)201: successful persistence of a resource (PUT/POST)204: no content (it could mean that aDELETEorPUTwere sucessfuly executed or that the resource is not existing in the case of aGETrequests, like404return code)400: invalid parameters (GET/PUT/POST/DELETE)401: authentication issue (GET/PUT/POST/DELETE)403: forbidden, access rights issue (GET/PUT/POST/DELETE)404: the resources or restful endpoint not exists (GET/PUT/POST/DELETE)50X: technical errors on the server-side (GET/PUT/POST/DELETE)
- The URI which has an important meaning for the invocation of a webservice: allowing, by a simple visual reading, to identify the resource.
Interfaces
You'll find here the RESTful endpoints definitions.
You'll also find here our WADL file generated from the source code.
This file provides the structure of the resources consumed and returned by our webservices (those must be serialized/deserialized in JSON).
You can use the wadl2java CXF maven plugin for building the Java object/resources classes for your JAX-RS client.
We're planning to use Swagger instead of WADL in the future. You also can use our available postman collections.
API Authentication
Authenticating an application to our API
Almost all our webservices are authenticated for each consumers/applications (you have to ask the uprodit.com team for getting a valid appid in order to be granted).
The solution implemented is the HMAC signature with our ws-cxf-ext library: https://ws-cxf-ext.github.io/ws-cxf-ext/
If your're consuming our API with a Java client application, you can use the client part of our library: https://gitlab.cwcloud.tech/oss/ws-cxf-ext/-/blob/master/docs/getting-started.md#declaring-clients
If you can't use our client library (because you're using another programing language for example), you have to concatenate and pass the following parameters in the Authorization header:
auth_consumer_key: environment HMAC-SHA1 hashing with theappidauth_callback: webservice url (with the query params)auth_nonce: random generated token (you can use a random UUID) hashed in HMAC-SHA1 with theappidauth_token: random generated token (do not use the same one you use with theauth_nonceparameter)auth_signature: URI and token concatenation (auth_token) hashed in HMAC-SHA1 with theappidauth_timestamp: timestampauth_signature_method:HMAC-SHA1as string constant
Those parameters must be concatenates with the following form:
Auth auth_consumer_key=value&auth_callback=value&...
Here's an example of javascript function for generating this signature:
const hmacsha1 = require('hmacsha1');
const uuid = require('uuid');

function generateSignature(appid, env, uri) {
  auth_signature_method = 'HMAC-SHA1';
  auth_consumer_key = encodeURIComponent(hmacsha1(appid, env));
  auth_token = uuid.v4();
  uri_path = uri.replace(new RegExp('http(s)?://[^/]*'), '')
  auth_signature = encodeURIComponent(hmacsha1(appid, uri_path + auth_token));
  auth_nonce = encodeURIComponent(hmacsha1(appid, uuid.v4()));
  auth_callback = encodeURIComponent(uri_path);
  auth_timestamp = new Date().getTime();

  return `Auth ?auth_signature=${auth_signature}&auth_nonce=${auth_nonce}&auth_callback=${auth_callback}&auth_timestamp=${auth_timestamp}&auth_token=${auth_token}&auth_signature_method=${auth_signature_method}&auth_consumer_key=${auth_consumer_key}`;
}

console.log(generateSignature("challenge_uprodit", "production", "https://api.uprodit.com/v2/profile/personal/en/51"));
Here's the npm dependancy you need to install for making it works with node.js or a frontend framework like Angular, React of Vue.js:
npm init
npm install hmacsha1 --save
npm install uuid --save
The typescript version:
import hmacsha1 from 'hmacsha1'
import { v4 } from 'uuid'

const generateSignature = (appid, env, uri) => {
    var auth_signature_method = 'HMAC-SHA1';
    var auth_consumer_key = encodeURIComponent(hmacsha1(appid, env));
    var auth_token = v4();
    var uri_path = uri.replace(new RegExp('http(s)?://[^/]*'), '')
    var auth_signature = encodeURIComponent(hmacsha1(appid, uri_path + auth_token));
    var auth_nonce = encodeURIComponent(hmacsha1(appid, v4()));
    var auth_callback = encodeURIComponent(uri_path);
    var auth_timestamp = new Date().getTime();

    return `Auth ?auth_signature=${auth_signature}&auth_nonce=${auth_nonce}&auth_callback=${auth_callback}&auth_timestamp=${auth_timestamp}&auth_token=${auth_token}&auth_signature_method=${auth_signature_method}&auth_consumer_key=${auth_consumer_key}`;
}

export default generateSignature;
Here's an example in Python 3:
from hashlib import sha1
from uuid import uuid4
from time import time
from base64 import encodebytes
from urllib.parse import quote

import hmac
import re

def hmacsha1(key, raw):
    hashed = hmac.new(str.encode(key), str.encode(raw), sha1)
    return encodebytes(hashed.digest()).decode('utf-8').rstrip('\n')

def generate_signature (appid, env, uri):
    auth_signature_method = 'HMAC-SHA1'
    auth_consumer_key = quote(hmacsha1(appid, env))
    auth_token = uuid4()
    uri_path = re.sub("http(s)?://[^/]*", "", uri)
    auth_signature = quote(hmacsha1(appid, "{}{}".format(uri_path, auth_token)))
    auth_nonce = quote(hmacsha1(appid, "{}".format(uuid4())))
    auth_callback = quote(uri_path)
    auth_timestamp = time()
    return "Auth ?auth_signature={}&auth_nonce={}&auth_callback={}&auth_timestamp={}&auth_token={}&auth_signature_method={}&auth_consumer_key={}".format(auth_signature, auth_nonce, auth_callback, auth_timestamp, auth_token, auth_signature_method, auth_consumer_key)

print(generate_signature("challenge_uprodit", "production", "https://api.uprodit.com/v2/profile/personal/en/51"))
Another way for generating this signature is using the /v1/authheader restful endpoint like that:
$ curl "https://api.uprodit.com/v1/authheader" -d '{"appid":"XXXXXXX","env":"YYYY","uri":"https://api.uprodit.com/v1/search/all?startIndex=0&maxResults=10&usecase=perso"}' -H "Content-Type: application/json"
{"authorization":"Auth ?auth_signature=CQtP0y0VdeZ%2FQz%2FpCXmO4sddsdleTKI%3D&auth_nonce=vYGxnKbLFPxsdlsdksl8kg9XX%2BPQ6X2c%3D&auth_callback=%2Fv1%2Fsearch%2Fall&auth_timestamp=1638971145860&auth_token=0c5bdc20-daca-4f8e-81c3-e0f65591927e&auth_signature_method=HMAC-SHA1&auth_consumer_key=11aqkYrxIy7pqsfkslqfklsp1JSZUsdsd%3D"}
You'll have to pass this value in the Authorization header of the webservice you want to invoke (which corresponds to the uri passed in the body).
This solution is suitable for quick tests but it's not recommended in production because you'll have big performances issues multiplying by 2 the number of http requests. It's far more better to have implemented or imported locally a signature generation function.
Small hack if you make your calls in shell, you can use jq to directly pick the value of the token in a variable like this:
authorization=$(curl "https://api.uprodit.com/v1/authheader" -d '{"appid":"challenge_uprodit","env":"production","uri":"https://api.uprodit.com/v2/profile/personal/en/51"}' -H "Content-Type: application/json" 2>/dev/null|jq .authorization -r)
Then directly invoke the webservice like this:
curl -H "Authorization: ${authorization}" "https://api.uprodit.com/v2/profile/personal/en/51" 2>/dev/null | jq .
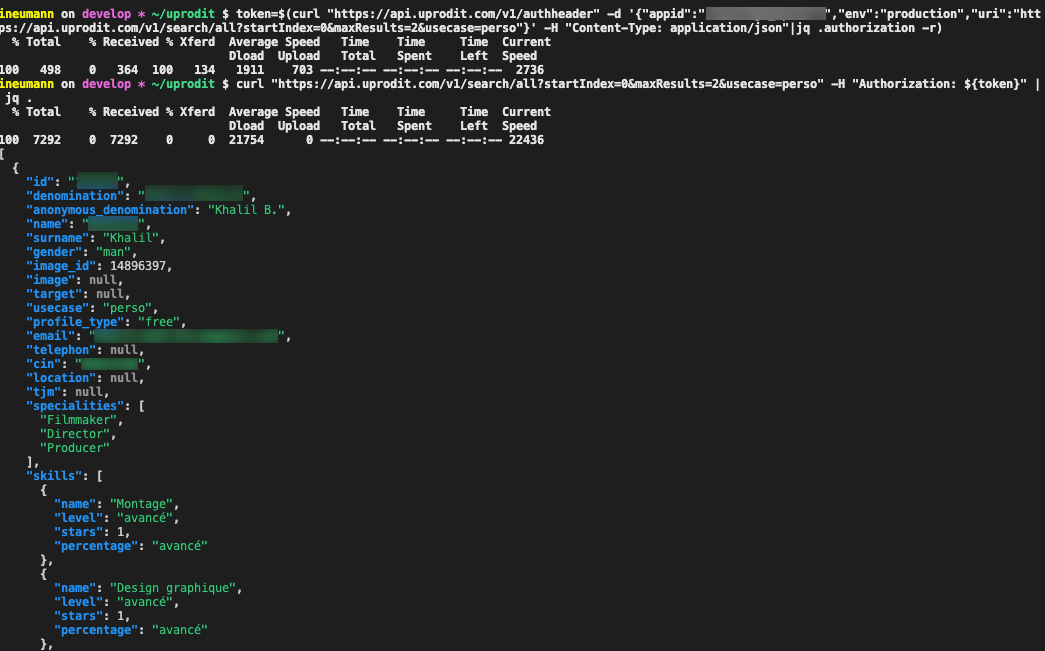
Search query example:
User authentication
Some API are also checking the connected user permissions either via the following two headers:
x-uprodit-username: user's emailx-uprodit-password: user's password
Or the x-uprodit-token header which is a 30 days validity token generated with the /v1/token restful endpoints like this:
$ authorization=$(curl "https://api.uprodit.com/v1/authheader" -d '{"appid":"challenge_uprodit","env":"production","uri":"https://api.uprodit.com/v1/token"}' -H "Content-Type: application/json" 2>/dev/null|jq .authorization -r)
$ curl -X POST https://api.uprodit.com/v1/token -H "Authorization: ${authorization}" -H "Content-Type: application/json" -d '{"username":"someone@uprodit.com","password":"changeit"}'
{"token": "TOKEN_BASE64_VALUE"}
Small hack with jq if your using shell scripts:
$ authorization=$(curl "https://api.uprodit.com/v1/authheader" -d '{"appid":"challenge_uprodit","env":"production","uri":"https://api.uprodit.com/v1/token"}' -H "Content-Type: application/json" 2>/dev/null|jq .authorization -r)
$ token=$(curl -X POST https://api.uprodit.com/v1/token -H "Authorization: ${authorization}" -H "Content-Type: application/json" -d '{"username":"idriss.neumann@comwork.io","password":"mypassword"}' 2>/dev/null|jq .token -r)
$ authorization=$(curl "https://api.uprodit.com/v1/authheader" -d '{"appid":"challenge_uprodit","env":"production","uri":"https://api.uprodit.com/v1/user/1"}' -H "Content-Type: application/json" 2>/dev/null|jq .authorization -r)
$ curl -H "Authorization: ${authorization}" -H "x-uprodit-token: ${token}" "https://api.uprodit.com/v1/user/1" -v
In order to avoid compromising your password, we strongly advise you to use this token must of the time and only use your login/password for generating a new token using the /v1/token restful endpoint, when your current token is expired (you'll have 401 errors when it's the case).